Search

Types of Power Supply

There are many types of power supply. Most are designed to convert high voltage AC mains electricity to a suitable low voltage supply for electronics circuits and other devices. A power supply can by broken down into a series of blocks, each of which performs a particular function.

For example a 5V regulated supply:

Block Diagram of a Regulated Power Supply System

Each of the blocks is described in more detail below:

  • Transformer - steps down high voltage AC mains to low voltage AC.
  • Rectifier - converts AC to DC, but the DC output is varying.
  • Smoothing - smooths the DC from varying greatly to a small ripple.
  • Regulator - eliminates ripple by setting DC output to a fixed voltage.
Power supplies made from these blocks are described below with a circuit diagram and a graph of their output:

Isnin, 1 Julai 2013

7812 Datasheet - THREE TERMINAL POSITIVE FIXED VOLTAGE REGULATORS - Motorola, Inc


7812 pdf, 7812 description, 7812 datasheets, 7812 view ::: ALLDATASHEET :::

Electronic Component's Datasheet Search Site

Mirror site (Language) :  EnglishChineseGermanJapaneseRussianKoreanSpanishFrenchItalianPortuguesePolish
Electronic Components, Parts, Semiconductors, Diode, Triac, LED, Capacitor, Connector, LCD, Relay, Transistor, other information
Part Name    
    Description 

   Shortcut :      7810(12)    7811(33)    7812(49)    7813(6)    7814(12)    7815(8)    7816(6)    7817(29)    7818(1)    7819(2)    781K(9)


Datasheet

    7812 - THREE TERMINAL POSITIVE FIXED VOLTAGE REGULATORS - Motorola, Inc

Part No. 7812
Description  THREE TERMINAL POSITIVE
FIXED VOLTAGE REGULATORS
File Size  278.25 Kbytes / 
16 Pages
Maker  Motorola, Inc
Html View 1   2   3   4   5   6   7   8   9    


Related Electronics Part Number

Part NumberComponents DescriptionHtml ViewManufacturer
TA7805SBTHREE TERMINAL POSITIVE VOLTAGE REGULATORS 1 2 3 4 5 MoreToshiba Semiconductor
LM340THREE TERMINAL POSITIVE FIXED VOLTAGE REGULATORS 1 2 3 4 5 MoreON Semiconductor
LM340THREE TERMINAL POSITIVE FIXED VOLTAGE REGULATORS 1 2 3 4 5 MoreMotorola, Inc
KIA78M05TBIPOLAR LINEAR INTEGRATED CIRCUIT THREE TERMINAL POSITIVE VOLTAGE REGULATORS 1 2 3 4 5 MoreKEC(Korea Electronics)
KIA78S05PBIPOLAR LINEAR INTEGRATED CIRCUIT THREE TERMINAL POSITIVE VOLTAGE REGULATORS 1 2 3 4 5 MoreKEC(Korea Electronics)
KIA78M05PBIPOLAR LINEAR INTEGRATED CIRCUIT THREE TERMINAL POSITIVE VOLTAGE REGULATORS 1 2 3 4 5 MoreKEC(Korea Electronics)
PL78M05XJ3Three Terminal Medium Current Positive Voltage Regulators 1 2 3 4 Cystech Electonics Corp.
PL78M05XT3Three Terminal Medium Current Positive Voltage Regulators 1 2 3 4 Cystech Electonics Corp.
PL317E3Three Terminal Adjustable Output Positive Voltage Regulators 1 2 3 4 5 MoreCystech Electonics Corp.

Link URL


Ahad, 30 Jun 2013

8VDC Power Supply With Over-Voltage Protection


This 8V DC power supply was designed for use with an expensive piece of electronic equipment. It features full over-voltage protection as a precaution against regulator failure, either in the supply itself or inside the equipment it is powering. The circuit uses a conventional full-wave rectifier, followed by a 3-terminal voltage regulator (REG1) with appropriate filtering. When power is applied and switch S1 is in the “Run” position, REG1’s output is fed to the load via a 500mA fuse and Schottky diode D3.

This also lights LED2 (yellow) and LED3 (green), which respectively indicate the presence of the unregulated and regulated voltages. D3 is there to protect the circuit against external voltage sources (eg, charged capacitors). A “crowbar” circuit comprising ZD1 and SCR1 provides the over-voltage protection. It works like this: if a fault develops (eg, REG1 short circuit) which causes the output voltage to rise above 9.1V, ZD1 turns on and applies a voltage to the gate of SCR1

Circuit diagram:
Figure 1 8V DC Power Supply With Over-Voltage Protection Circuit Diagram

If the voltage then continues to rise, SCR1 turns on (at about 10V) and “blows” the fuse. Zener diode ZD2 provides emergency over-voltage protection in case the “crowbar” circuit develops a fault. Switch S1 is provided so the operator can occasionally test the “crowbar” function. When S1 is switched to the “Test” posi­tion, the load is disconnected by S1b and the unregulated supply voltage is applied by S1a to the “crowbar” circuit, thus causing it to trigger. When this happenS, LEDs 2 & 3 (green and yellow) extinguish and LED1 (red) lights to indicate that the SCR has triggered. The SCR turns off again when S1 is switched back to the “Run” position.

Author: L. Cox – Copyright: Silicon Chip Electronics

Transformerless Power Supplies


There are several ways to convert an AC voltage at a wall receptacle into the DC voltage required by a microcontroller. Traditionally, this has been done with a transformer and rectifier circuit. There are also switch- ing power supply solutions, however, in applications that involve providing a DC voltage to only the microcontroller and a few other low-current devices, transformer-based or switcher-based power supplies may not be cost effective. The reason is that the transformers in transformer-based solutions, and the inductor/MOSFET/controller in switch-based solutions, are expensive and take up a considerable amount of space. This is especially true in the appliance market, where the cost and size of the components surrounding the power supply may be significantly less than the cost of the power supply alone.

Transformerless power supplies provide a low-cost alternative to transformer-based and switcher-based power supplies. The two basic types of transformerless power supplies are resistive and capacitive. This application note will discuss both with a focus on the following:
A circuit analysis of the supply.
The advantages and disadvantages of each power supply.
Additional considerations including safety requirements and trade-offs associated with half-bridge versus full-bridge rectification.


Power Supply For USB Devices


More and more equipment is sold that runs off internal rechargeable batteries. Although a matching charger is usually supplied in the package, there are also devices that can only be charged via a USB port. That is not surprising in the case of USB MP3 players, which have to ‘dock’ in the PC anyway for some time for the purpose of file transferring. Still, the same ‘feature’ can be a serious disadvantage, for example, on ‘computer-free’ holidays. Sometimes it makes you wonder how simple the solutions to such problems actually turn out to be. After all, if it’s just a supply voltage we’re after, then a USB port is easily imitated.

The circuit shown here is nothing but a 7805 in a dead standard configuration. The innovation, if any, might be USB connector to which the MP3 player can be connected. The 7805 comes in different flavours most devices can supply 1 A, but there are also more advanced variants that achieve up to 1.5 A. Because a USB device is never allowed to draw more than 500 mA from the port it is plugged into, the circuit shown here should be able to supply charging and/or operating current to up to two (or three) USB devices at the same time. The input voltage may be a direct voltage of anything between 7 and 24 volts, so for use at home or abroad a simple wall cube with DC output is sufficient.
Figure 1 Power Supply Circuit Diagram For USB Devices

Another useful bit to make yourself might be a cable with an inline fuse and a cigarette lighter plug so you can tap into a vehicle supply (note that this may be up to 14.4 V with a running engine). At an output current of 1 A and an input voltage of just 7 V, the 7805 already dissipates 2 watts. Assuming you’re using the most commonly seen version of the 7805, the TO-220 case with its metal tab will have a thermal resistance of about 50 °C/W. Also assuming that the ambient temperature is 20 °C, the 7805’s internal (chip) temperature will be around 120 °C. In most cases, 150 °C is the specified maximum, so ample cooling must be provided especially in a car and with relatively high input voltages.

12VDC to 9VDC Converter

Figure:1

12V to 9V DC Converter
Posted Apr 20, 2013 at 12:21 pm

To get a more precise output voltage, replace zener diode Z1 with 10V and R1 with a 1Kilo ohm potentiometer. A Coolrib for Q1 is optional but highly recommended. You can replace Q1 for a more robust type to get more output amps depending on your requirements. Simple circuit to power your 9 volt cassette recorder and other stuff.

Parts List:
R1 = 560 ohm
C1 = 1000uF/40V, Electrolytic
C2 = 10uF/25V, Electrolytic
C3 = 330nF, Ceramic
Z1 = 9.1V, 1watt zener
Q1 = ECG184, NTE184

Transformerless 5 Volt Power Supply

An increasing number of appliances draw a very small current from the power supply. If you need to design a mains powered device, you could generally choose between a linear and a switch-mode power supply. However, what if the appliance’s total power consumption is very small? Transformer-based power supplies are bulky, while the switchers are generally made to provide greater current output, with a significant increase in complexity, problems involving PCB layout and, inherently, reduced reliability.

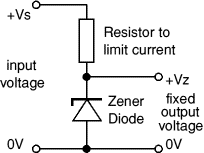
Is it possible to create a simple, minimum part-count mains (230 VAC primary) power supply, without transformers or coils, capable of delivering about 100 mA at, say, 5 V A general approach could be to employ a highly inefficient stabilizer that would rectify AC and, utilizing a zener diode to provide a 5.1 V output, dissipate all the excess from 5.1 V to (230×v2) volts in a resistor. Even if the load would require only about 10 mA, the loss would be approximately 3 watts, so a significant heat dissipation would occur even for such a small power consumption.

At 100 mA, the useless dissipation would go over 30 W, making this scheme completely unacceptable. Power conversion efficiency is not a major consideration here; instead, the basic problem is how to reduce heavy dissipation and protect the components from burning out. The circuit shown here is one of the simplest ways to achieve the above goals in practice. A JVR varistor is used for overvoltage/surge protection. Voltage divider R1-R2 follows the rectified 230 V and, when it is high enough, T1 turns on and T3 cannot conduct.

Circuit diagram:
Figure 1 Transformerless 5 Volt Power Supply Circuit Diagram

When the rectified voltage drops, T1 turns off and T3 starts to conduct current into the reservoir capacitor C1. The interception point (the moment when T1 turns off) is set by P1 (usually set to about 3k3), which controls the total output current capacity of the power supply: reducing P1 makes T1 react later, stopping T3 later, so more current is supplied, but with increased heat dissipation. Components T2, R3 and C2 form a typical ‘soft start’ circuit to reduce current spikes this is necessary in order to limit C1’s charging current when the power supply is initially turned on. At a given setting of P1, the output current through R5 is constant.

Thus, load R4 takes as much current as it requires, while the rest goes through a zener diode, D5. Knowing the maximum current drawn by the load allows adjusting P1 to such a value as to provide a total current through R5 just 5 to 6 mA over the maximum required by the load. In this way, unnecessary dissipation is much reduced, with zener stabilization function preserved. Zener diode D5 also protects C1 from over voltages, thus enabling te use of low-cost 16 V electrolytics.

The current flow through R5 and D5, even when the load is disconnected, prevents T3’s gate-source voltage from rising too much and causing damage to device. In addition, T1 need not be a high-voltage transistor, but its current gain should exceed 120 (e.g. BC546B, or even BC547C can be used).

CAUTION!
The circuit is not galvanically isolated from the mains. Touching any part of the circuit (or any circuitry it supplies power to) while in operation, is dangerous and can result in an electric shock! This circuit should not be built or used by individuals without proper knowledge of mains voltage procedures.


Copyright: Elektor Electronics Magazine
Author: Srdjan Jankovic & Branko Milovanovic

12VDC Transformerless Power Supply

This circuit will supply up to about 20ma at 12 volts. It uses capacitive reactance instead of resistance; and it doesn’t generate very much heat.The circuit draws about 30ma AC. Always use a fuse and/or a fusible resistor to be on the safe side. The values given are only a guide. There should be more than enough power available for timers, light operated switches, temperature controllers etc, provided that you use an optical isolator as your circuit’s output device. (E.g. MOC 3010/3020) If a relay is unavoidable, use one with a mains voltage coil and switch the coil using the optical isolator.C1 should be of the ‘suppressor type’; made to be connected directly across the incoming Mains Supply.


They are generally covered with the logos of several different Safety Standards Authorities. If you need more current, use a larger value capacitor; or put two in parallel; but be careful of what you are doing to the Watts. The low voltage ‘AC’ is supplied by ZD1 and ZD2. The bridge rectifier can be any of the small ‘Round’, ‘In-line’, or ‘DIL’ types; or you could use four separate diodes. If you want to, you can replace R2 and ZD3 with a 78 Series regulator. The full sized ones will work; but if space is tight, there are some small 100ma versions available in TO 92 type cases. They look like a BC 547. It is also worth noting that many small circuits will work with an unregulated supply.

Figure:1 Transformerless Power Supply Circuit Diagram

Figure 1  Transformerless Power Supply Circuit Diagram


You can, of course, alter any or all of the zener diodes in order to produce a different output voltage. As for the mains voltage, the suggestion regarding the 110v version is just that, a suggestion. I haven’t built it, so be prepared to experiment a little. I get a lot of emails asking if this power supply can be modified to provide currents of anything up to 50 amps. It cannot. The circuit was designed to provide a cheap compact power supply for CMOS logic circuits that require only a few milliamps. The logic circuits were then used to control mains equipment (fans, lights, heaters etc.) through an optically isolated triac.

If more than 20mA is required it is possible to increase C1 to 0.68uF or 1uF and thus obtain a current of up to about 40mA. But ‘suppressor type’ capacitors are relatively big and more expensive than regular capacitors; and increasing the current means that higher wattage resistors and zener diodes are required. If you try to produce more than about 40mA the circuit will no longer be cheap and compact, and it simply makes more sense to use a transformer. The Transformerless Power Supply Support Material provides a complete circuit description including all the calculations.

Web-masters Note:
I have had several requests for a power supply project without using a power supply. This can save the expense of buying a transformer, but presents potentially lethal voltages at the output terminals. Under no circumstances should a beginner attempt to build such a project.

Important Notice:
Electric Shock Hazard. In the UK,the neutral wire is connected to earth at the power station. If you touch the “Live” wire, then depending on how well earthed you are, you form a conductive path between Live and Neutral. DO NOT TOUCH the output of this power supply. Whilst the output of this circuit sits innocently at 12V with respect to (wrt) the other terminal, it is also 12V above earth potential. Should a component fail then either terminal will become a potential shock hazard.

MAINS ELECTRICITY IS VERY DANGEROUS.

If you are not experienced in dealing with it, then leave this project alone. Although Mains equipment can itself consume a lot of current, the circuits we build to control it, usually only require a few milliamps. Yet the low voltage power supply is frequently the largest part of the construction and a sizeable portion of the cost.

Author: Ron J – Copyright: Zen

Low Voltage Power Supply Without Transformer


Figure 1 

The circuit diagram was designed to create a power supply without utilizing any transformer circuit. This circuit illustrates the advantages as well as the safety precautions to keep in mind.

Power supplies are devices accustomed to provide electrical or other sort of energy to a load or cluster of load. A type of power supply that makes use of a transformer is the AC powered linear power supply. The voltage from the wall socket is converted by the transformer to produce a normally lower voltage. Switched-mode and AC/DC power supplies are the types that does not utilize the presence of transformers. These transformers are responsible for transmitting electrical supply from one circuit to another through its coils (windings).

Designing a transformerless power supply makes it more suitable for smaller installations, in any location, where the area may be limited. The circuit can manage the high current coming from the mains by supplying 12 Volts at 20mA. The reason behind using capacitive reactance rather than resistance is the fact the the type of current flowing into the circuit is alternating. It can also be used with fluctuating DC supply. The reactance adapts with the way the components react in the circuit in terms of frequencies. A fusible resistor can also be used to provide more safety.

As an output device, optical sensors are preferred by measuring the intensity change of light when the power is increased among other controllers like temperature controllers, light switches or timers. The capacitor C1 are connected across the mains supply to act as restrainer. These capacitors are usually tagged with safety standard measures, although they are usually more expensive type rather than ordinary capacitors. Placing two capacitors in parallel or increasing the value can give way to additional current. The two zener diodes are responsible for supplying the low voltage because these types of diodes controls the output by setting their breakdown or desired voltage, as they flow to the rectifier. The rectifier is responsible for converting the AC to DC. Opposite conversion form DC to AC uses an inverter. If the circuit would require an output higher than 40mA, transformers would be more significant to use.

The comparison between transformerless and transformer-based power supplies is not easy to identify due to the technologies that each one offers in the market. But the primary difference between the two are the physical dimension, noise, efficiency and the intensity of harmonic distortion that they produce.

Source:zen22142.zen.co.uk/Circuits/Power/tps.htm

Jumaat, 8 Mac 2013

links PS

Standard Power Supply

Power supply
As with most power amplifiers, the ±60 V power supply need not be regulated. Owing to the relatively high power output, the supply needs a fairly large mains transformer and corresponding smoothing capacitors—see circuit diagram below.
Most Power Supply for Amplifier
Note that the supply shown is for a mono amplifier; a stereo outfit needs two supplies. 
The power supply is straightforward, but can handle a large current. Voltage 'ac'serves as drive for the power-on delay circuit. The transformer is a 625 VA type, and the smoothing capacitors are 10 000 µF, 100 V electrolytic types. The bridge rectifier needs to be mounted on a suitable heat sink or be mounted directly on the bottom cover of the metal enclosure.. The transformer needs two secondary windings, providing 42.5 V each. The prototype used a toroidal transformer with 2x40 V secondaries. The secondary winding of this type of transformer is easily extended: in the prototype 4 turns were added and this gave secondaries of 2x42.5 V.

Power Supplies

Power Supplies

Types of Power Supply

There are many types of power supply. Most are designed to convert high voltage AC mains electricity to a suitable low voltage supply for electronics circuits and other devices. A power supply can by broken down into a series of blocks, each of which performs a particular function.

For example a 5V regulated supply:

Block Diagram of a Regulated Power Supply System

Each of the blocks is described in more detail below:

  • Transformer - steps down high voltage AC mains to low voltage AC.
  • Rectifier - converts AC to DC, but the DC output is varying.
  • Smoothing - smooths the DC from varying greatly to a small ripple.
  • Regulator - eliminates ripple by setting DC output to a fixed voltage.
Power supplies made from these blocks are described below with a circuit diagram and a graph of their output:

Transformer + Rectifier


DC power supply, transformer + rectifier

The varying DC output is suitable for lamps, heaters and standard motors. It is not suitable for electronic circuits unless they include a smoothing capacitor.

Further information: Transformer | Rectifier

Dual Supplies


Dual power supplySome electronic circuits require a power supply with positive and negative outputs as well as zero volts (0V). This is called a 'dual supply' because it is like two ordinary supplies connected together as shown in the diagram.

Dual supplies have three outputs, for example a ±9V supply has +9V, 0V and -9V outputs.

Transformer + Rectifier + Smoothing


Smooth DC power supply, transformer + rectifier + smoothing

The smooth DC output has a small ripple. It is suitable for most electronic circuits.

Further information: Transformer | Rectifier | Smoothing

Transformer + Rectifier + Smoothing + Regulator


Regulated DC power supply, transformer + rectifier + smoothing + regulator

The regulated DC output is very smooth with no ripple. It is suitable for all electronic circuits.

Further information: Transformer | Rectifier | Smoothing | Regulator

Transformer


Transformers convert AC electricity from one voltage to another with little loss of power. Transformers work only with AC and this is one of the reasons why mains electricity is AC.

Step-up transformers increase voltage, step-down transformers reduce voltage. Most power supplies use a step-down transformer to reduce the dangerously high mains voltage (230V in UK) to a safer low voltage.

The input coil is called the primary and the output coil is called thesecondary. There is no electrical connection between the two coils, instead they are linked by an alternating magnetic field created in the soft-iron core of the transformer. The two lines in the middle of the circuit symbol represent the core.

Transformers waste very little power so the power out is (almost) equal to the power in. Note that as voltage is stepped down current is stepped up.

The ratio of the number of turns on each coil, called the turns ratio, determines the ratio of the voltages. A step-down transformer has a large number of turns on its primary (input) coil which is connected to the high voltage mains supply, and a small number of turns on its secondary (output) coil to give a low output voltage.

turns ratio = Vp = Np and power out = power in
VsNsVs × Is = Vp × Ip
Vp = primary (input) voltage
Np = number of turns on primary coil
Ip = primary (input) current
Vs = secondary (output) voltage
Ns = number of turns on secondary coil
Is = secondary (output) current

Rectifier


There is more information
about rectifiers on the
Electronics in Meccano
website.
There are several ways of connecting diodes to make a rectifier to convert AC to DC. The bridge rectifier is the most important and it produces full-wave varying DC. A full-wave rectifier can also be made from just two diodes if a centre-tap transformer is used, but this method is rarely used now that diodes are cheaper. Asingle diode can be used as a rectifier but it only uses the positive (+) parts of the AC wave to produce half-wave varying DC.

Bridge rectifier

A bridge rectifier can be made using four individual diodes, but it is also available in special packages containing the four diodes required. It is called a full-wave rectifier because it uses all the AC wave (both positive and negative sections). 1.4V is used up in the bridge rectifier because each diode uses 0.7V when conducting and there are always two diodes conducting, as shown in the diagram below. Bridge rectifiers are rated by the maximum current they can pass and the maximum reverse voltage they can withstand (this must be at least three times the supply RMS voltage so the rectifier can withstand the peak voltages). Please see the Diodes page for more details, including pictures of bridge rectifiers.
Operation of a Bridge RectifierFull-wave Varying DC
Bridge rectifier
Alternate pairs of diodes conduct, changing over
the connections so the alternating directions of
AC are converted to the one direction of DC.
Output: full-wave varying DC
(using all the AC wave)

Single diode rectifier

A single diode can be used as a rectifier but this produces half-wave varying DC which has gaps when the AC is negative. It is hard to smooth this sufficiently well to supply electronic circuits unless they require a very small current so the smoothing capacitor does not significantly discharge during the gaps. Please see the Diodes page for some examples of rectifier diodes.
Single diode rectifierHalf-wave Varying DC
Single diode rectifierOutput: half-wave varying DC
(using only half the AC wave)

Smoothing

Smoothing is performed by a large value electrolytic capacitor connected across the DC supply to act as a reservoir, supplying current to the output when the varying DC voltage from the rectifier is falling. The diagram shows the unsmoothed varying DC (dotted line) and the smoothed DC (solid line). The capacitor charges quickly near the peak of the varying DC, and then discharges as it supplies current to the output.


Smoothing

Note that smoothing significantly increases the average DC voltage to almost the peak value (1.4 × RMSvalue). For example 6V RMS AC is rectified to full wave DC of about 4.6V RMS (1.4V is lost in the bridge rectifier), with smoothing this increases to almost the peak value giving 1.4 × 4.6 = 6.4V smooth DC.

Smoothing is not perfect due to the capacitor voltage falling a little as it discharges, giving a small ripple voltage. For many circuits a ripple which is 10% of the supply voltage is satisfactory and the equation below gives the required value for the smoothing capacitor. A larger capacitor will give less ripple. The capacitor value must be doubled when smoothing half-wave DC.

There is more information
about smoothing on the
Electronics in Meccano
website.
Smoothing capacitor for 10% ripple, C =5 × Io
Vs × f
C = smoothing capacitance in farads (F)
Io = output current from the supply in amps (A)
Vs = supply voltage in volts (V), this is the peak value of the unsmoothed DC
f = frequency of the AC supply in hertz (Hz), 50Hz in the UK


Regulator


Voltage regulatorVoltage regulator, photograph © Rapid Electronics
Voltage regulator
Photograph © Rapid Electronics

Voltage regulator ICs are available with fixed (typically 5, 12 and 15V) or variable output voltages. They are also rated by the maximum current they can pass. Negative voltage regulators are available, mainly for use in dual supplies. Most regulators include some automatic protection from excessive current ('overload protection') and overheating ('thermal protection').

Many of the fixed voltage regulator ICs have 3 leads and look like power transistors, such as the 7805 +5V 1A regulator shown on the right. They include a hole for attaching a heatsink if necessary.

Please see the Electronics in Meccano website for more information about voltage regulator ICs.

Zener diode
zener diode
a = anode, k = cathode
Zener diode circuit

Zener diode regulator

For low current power supplies a simple voltage regulator can be made with a resistor and a zener diode connected in reverse as shown in the diagram. Zener diodes are rated by their breakdown voltage Vz andmaximum power Pz (typically 400mW or 1.3W).

The resistor limits the current (like an LED resistor). The current through the resistor is constant, so when there is no output current all the current flows through the zener diode and its power rating Pz must be large enough to withstand this.

Please see the Diodes page for more information about zener diodes.

Choosing a zener diode and resistor:

  1. The zener voltage Vz is the output voltage required
  2. The input voltage Vs must be a few volts greater than Vz
    (this is to allow for small fluctuations in Vs due to ripple)
  3. The maximum current Imax is the output current required plus 10%
  4. The zener power Pz is determined by the maximum current: Pz > Vz × Imax
  5. The resistor resistance: R = (Vs - Vz) / Imax
  6. The resistor power rating: P > (Vs - Vz) × Imax
Example: output voltage required is 5V, output current required is 60mA.
There is more information
about regulators on the
Electronics in Meccano
website.
  1. Vz = 4.7V (nearest value available)
  2. Vs = 8V (it must be a few volts greater than Vz)
  3. Imax = 66mA (output current plus 10%)
  4. Pz > 4.7V × 66mA = 310mW, choose Pz = 400mW
  5. R = (8V - 4.7V) / 66mA = 0.05kohm = 50ohm, choose R = 47ohm
  6. Resistor power rating P > (8V - 4.7V) × 66mA = 218mW, choose P = 0.5W